
Flooring Transition Strip Guide: Types, Installation & Design Tips
Transition strips rarely make it onto a mood board, but they shape how a whole home feels underfoot. They sit quietly where one floor meets another, smoothing the shift from plush carpet to warm oak or from waterproof vinyl to tile. When chosen well, they protect your investment, tidy up sightlines, and make every room feel intentional.
We at Custom Carpet Centers have spent over sixty years helping homeowners across Western New York, Buffalo, and Niagara Falls get these small details exactly right. This guide walks you through the main types of transition strips, the basics of installation, and a few design tips our flooring experts rely on every day.
Where One Floor Ends And Another Begins
Every home has thresholds. Doorways, hallways, stair landings, and open-plan layouts all need a clean handoff between materials. A transition strip bridges the gap, covers raw edges, and absorbs the natural expansion and contraction that every floor goes through with humidity and temperature.
Beyond looks, these strips also play a practical role. They prevent tripping, reduce wear along vulnerable edges, and keep moisture from sneaking beneath hardwood flooring or laminate planks. Skip them, and you tend to notice within a season or two.
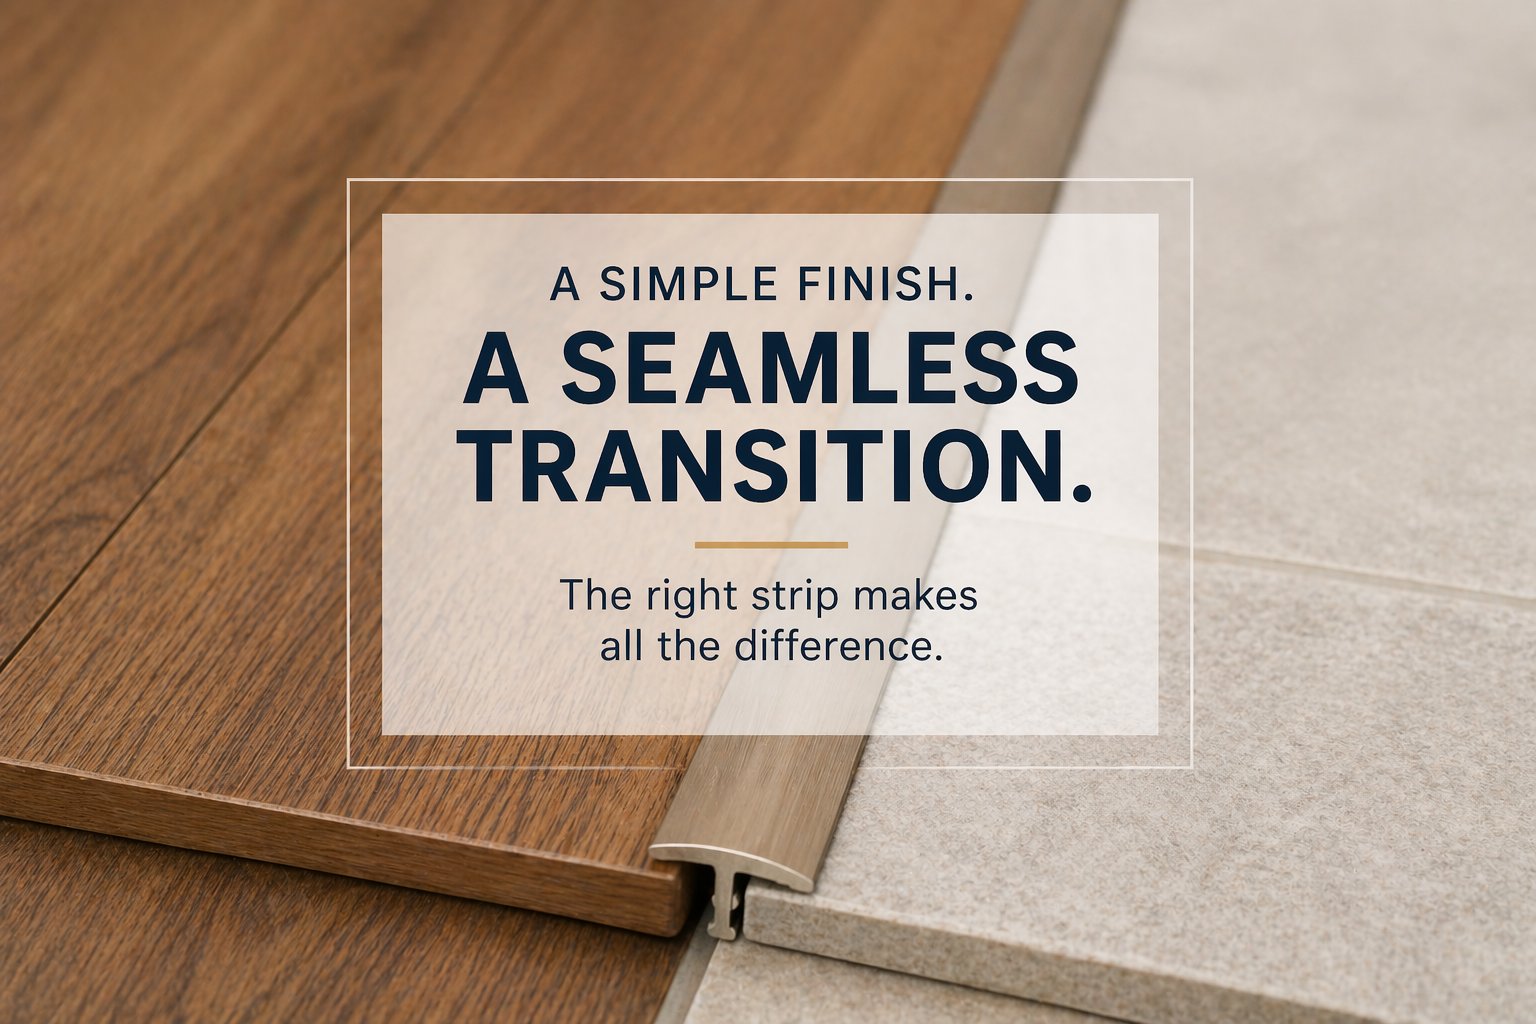
Six Transition Strip Types Worth Knowing
Different floor pairings call for different profiles. Here are the most common options our designers recommend:
- T-molding, used between two hard surfaces of equal height, such as hardwood meeting tile.
- Reducer strips, which slope gently from a taller floor down to a thinner one.
- Threshold strips, ideal for doorways where one surface sits noticeably higher.
- End caps, finishing the edge of a floor where it meets a sliding door or fireplace hearth.
- Stair nosing, wrapping the front lip of each step for safety and a polished look.
- Carpet-to-hard-surface strips, tucking carpet edges neatly against wood, tile, or vinyl.
A Quick Look At Installation
Installation sounds simple, and in many cases it is, but accuracy matters. The subfloor should be clean, level, and dry before anything is measured. Rushing this step is the most common reason transitions loosen or lift a few months in.
From there, most strips are installed with one of three methods. Snap-track systems use a metal base screwed to the subfloor, glue-down profiles bond directly to concrete or plywood, and nail-in styles work well over wood subfloors with matching luxury vinyl flooring or hardwood. The right choice depends on the floors involved and the traffic the area sees.
Design Tips That Make A Real Difference
A transition strip should feel like punctuation, not a speed bump. These small moves can elevate the finished look:
- Match the strip color to the darker of the two floors for a more seamless flow.
- Use a contrasting tone intentionally when you want to frame a room or highlight an archway.
- Keep finishes consistent, pairing satin with satin and matte with matte.
- Align strips directly under doorways so the change happens out of sight when the door is closed.
- Choose metal profiles in modern spaces and wood profiles in traditional ones to reinforce the overall style.
Pairing Strips With The Right Flooring
Every flooring material has a preferred transition style. Plush carpet usually needs a tack strip and Z-bar to hold its edge firmly against a harder neighbor. Engineered hardwood benefits from T-moldings that allow movement without gapping.
Waterproof vinyl and laminate floors tend to do best with flush reducers that respect their floating-floor construction. Tile, being rigid and heavy, often pairs with a low-profile metal threshold that resists chipping along its sharper edges. Getting this match right is where experience really shows.
Common Mistakes To Sidestep
A few small habits tend to cause most transition problems we see in homes. Watching for these keeps your floors looking sharp for years:
- Forgetting to leave expansion space beneath floating floors.
- Nailing through a strip into a concrete subfloor that needed adhesive instead.
- Picking a strip that is too thin for high-traffic doorways.
- Choosing a color only from a photo rather than an in-home sample.
- Installing strips before the flooring has acclimated to the room.
Get Transitions That Finish Every Room Beautifully
Come see us for friendly guidance, generous samples, and craftsmanship you can trust. Our team will help you choose the right profile, finish, and placement, then handle the details with professional flooring installation from start to finish. We would love to help your next project feel complete right down to the thresholds.